We went on a family vacation to Florida recently for 8 days, so I used the higher customs allowances as an excuse to pick something up for the Chevelle. I ordered the complete wiring for the car, and picked it up on the way home from the airport, and brought it back across to Canada with us duty/tax free! Which is a good savings. our taxes are 13% here in Ontario.
I ended up choosing the American Autowire Highway 22 kit. I chose it because it seems very straight forward (I will review it after I install). I also liked the Highway 22 kit because it is customizable to a lot of different applications and has spare circuits for adding other accessory's to the system. I liked how the kit also has longer then normal wire lengths so the fuse panel can be mounted away from the factory location. I think I am going to mount it on the kick panel inside the car so I can hide the wires and clean up the engine bay.

The kit seems very well laid out and separated into different areas. The instructions also seem well written.

This past week I was able to get out into the garage while the girls were at daycare for the day. I took this time to fire the 454 up one more time before I put it on the Chevelle frame. I try and run it when the girls aren't home (they are 3 and 1 year old) because it's so loud it scares them haha. I don't think the cheap mufflers I put on the run stand are doing much. I gave it a good run for about 30-40 minutes. I even pushed it a little harder revving it up to 5000 rpm and holding there. It runs great! and no leaks either!
After the run I cooled it down and drained the coolant and started taking the stand and engine apart enough to move to the frame. Once I had it off the stand, I installed the clutch and pressure plate.
The Clutch I got was from Ram Clutches, It was recommended to me by Summit Racing for its holding power and reasonable price.

Below is how it came as a kit. It comes with a plastic installation tool, and a new throw out bearing. I also picked up some mounting bolts for the pressure plate and a new bronze pilot bearing.


Here is the new pilot bearing. It goes in the end of the crankshaft for the nose of the transmission to ride on.

Installed in the crankshaft.
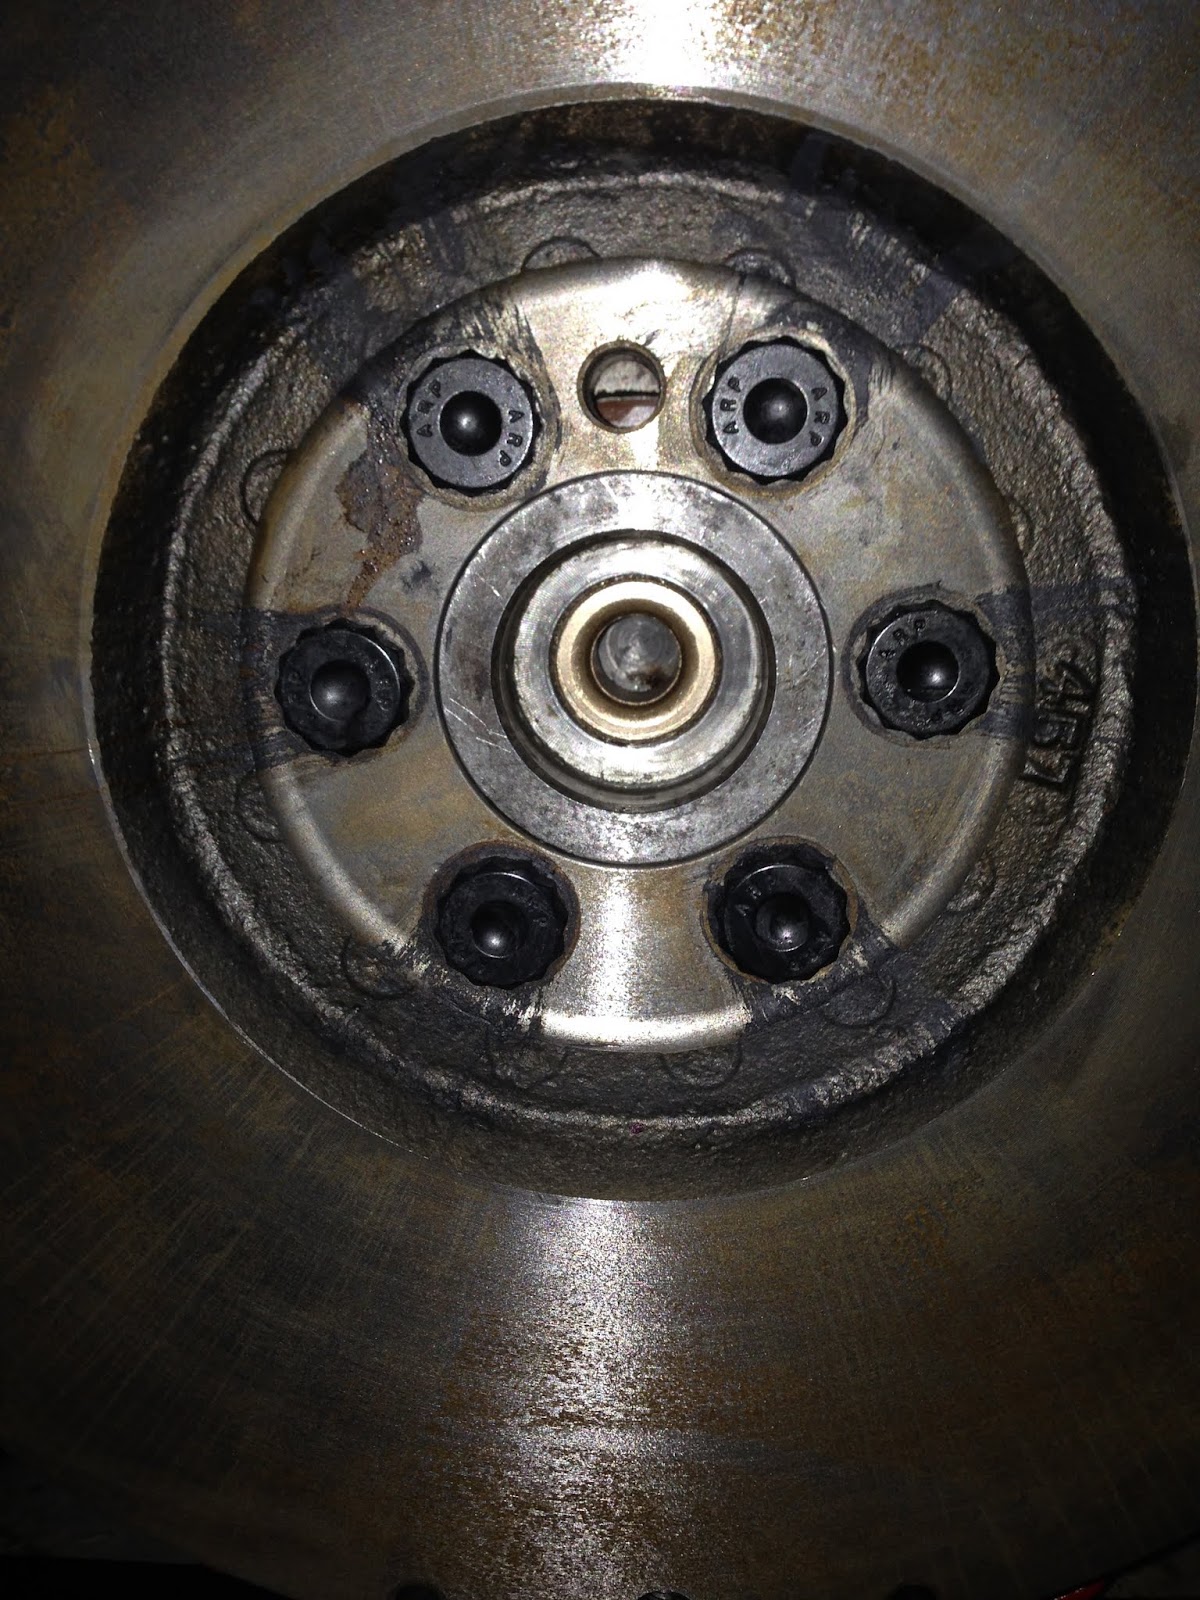
Here is the plastic installation tool. It is a plastic replica of the input shaft of the Muncie transmission. It is used to hold the clutch plate in place on center while the pressure plate can be bolted down onto the flywheel.


Here is the pressure plate installed.

I decided that I wanted to paint the Muncie black instead of the aluminum colour I had painted it when I rebuilt it. I had some "Rocker Guard" paint lying around the garage so I tried it out. I think I like it, It looks tough.


Next thing on my list to do is mate the tranny, bellhousing and engine together and bolt them onto the frame. That will be in the new year when I get some time out there after the holidays.
No comments:
Post a Comment