Saturday, March 30, 2013

Transmission Crossmember Install

Up until this blog post I have been writing about what I have been doing on my Chevelle build in the past couple of years, getting the reader up to date.  I am now going to be posting on current work as I am doing it.

This month I was finally able to get the frame ready for the final welding work that needs to be completed.  I finished installing the front and rear suspension.  I put the wheels on to get it sitting at ride height, which also made it easier to move the frame around.

Once again I asked my brother in law to do some more welding on the frame.

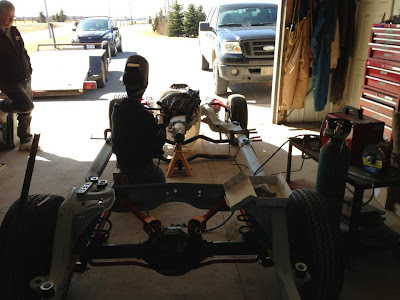
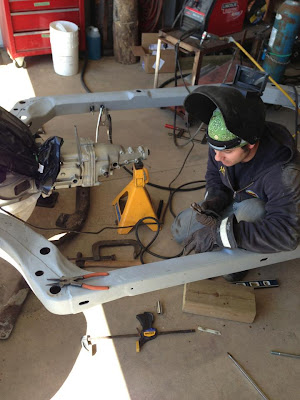
Here is the crossmember clamped in place with the engine/transmission that I set at 2.5 degrees pointing down.  This was to match the rear end that I measured to be pointing 2.5 degrees up.  I really hope I have this right so I don't run into driveshaft and ujoint issues down the road.


 Welding the crossmember brackets into place


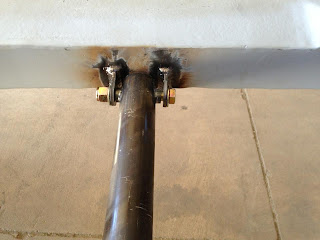
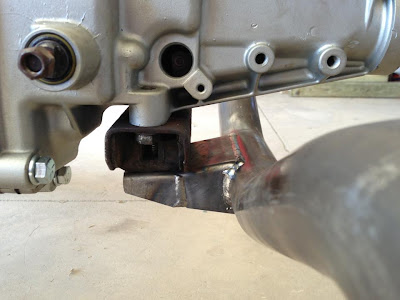
Here is the crossmember finished and in place


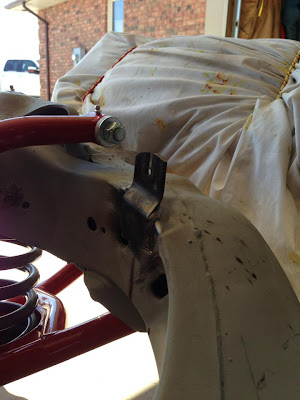
While he was already welding the crossmember in place, I had him weld on the frame bracket for the clutch linkage z-bar.  For this we installed the z-bar into place and lined it up where it looked and fit the best.  Unfortunately I don't have my exhaust manifolds yet to test for clearance issues.  Hopefully I don't run into problems here down the road.


Test Fitting, November 2012-February 2013

Over the winter my work on the Chevelle was slow paced.  What little time I found to work out in the garage I spent working on my transmission rebuild, and installing my suspension, rear end, and engine block in preparation for the transmission crossmember install.


I am also going to be installing the frame bracket for the clutch z-bar.  My Chevelle had an automatic transmission originally, so this bracket needs to be welded onto the frame for the clutch linkage needed for my 4 speed transmission.

Friday, March 29, 2013

Suspension and Rear End, August 2012

In August I ordered my suspension from UMI performance.  I ordered their Stage 2 total vehicle handling package, that came with everything pictured below in powdercoated red.


I also had a 67 chevelle 12 bolt rear built for me.  The rear end housing was the only thing that was used.  It came with new axles, seals, bearings, 3.73 gears, and a Eaton posi unit.


I painted it with POR 15 rust coating and then top coated it with POR 15 Chassis Coat Black

Frame Repairs, September-October 2012

Now that the frame was sand blasted, I was able to inspect the frame for any repairs that needed to be done.   I already knew about some rotten sections that were located on the frame rails where the frame bends up towards the engine saddle.  There were also a few spots around some of the body mounts that needed repair also.  My brother in law is a welder, so he was nice enough to volunteer his services for the welding work that I needed done.

Here are some pictures of the areas of concern


As can be seen by the pictures, there was some significant rot in these areas.

Here are the pictures of the repair work.


While we were already repairing the frame, I took this time to fully box the frame as well. I purchased a boxing kit from ABC Performance in Michigan.  I also purchased their custom transmission crossmember, which I will show in future posts.

Here are some pictures of the frame boxing


Frame Blasting, August-October 2012

I took a couple months off from working on the Chevelle after the birth of our daughter, Marley.  In August I started sand blasting the frame.  In hindsight I should have just paid to have this done by professionals because the set up I was using was too small and took too long.  But after about 15 hours total, spread over 3 months I had finished the sand blasting of the frame.


Body Removal, June 2012

  As we were patiently awaiting the arrival of our daughter, I had some time to do some more work on the Chevelle.  I took this time to remove the Body from the frame.  The method that I used for removing the body from the frame probably wasn't the best, but I do not have a body rotisserie.  So instead I used the backyard mechanic method of slowly jacking the body up off the frame by using cinder blocks.


Now that the frame was separated, I disassembled the front end steering linkage and suspension.


I also removed all the rear suspension, 10 bolt rear end, all the brake lines and fuel lines.  Now I was left with a bare frame.